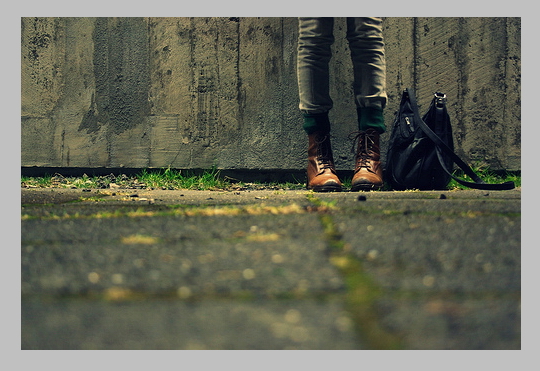
Step 1:
First of all, open any photo that you want to convert to HDR.
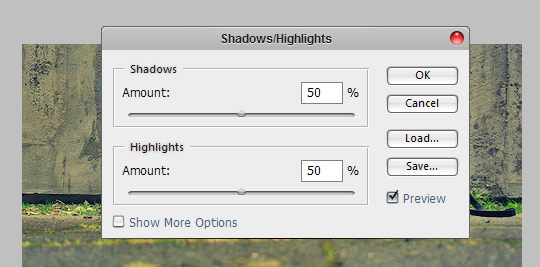
Step 2:
Now, go to Image> Adjustments> Shadow/Highlights. Set the “Shadow” and “Highlights” amount to 40-50%
Step 3:
Duplicate the layer, then go to Image> Adjustments> Desaturate (for CS3 users, choose “Image> Adjustments>Black & White” and click “OK”).
After that, change the layer blending to “Hard Light“.
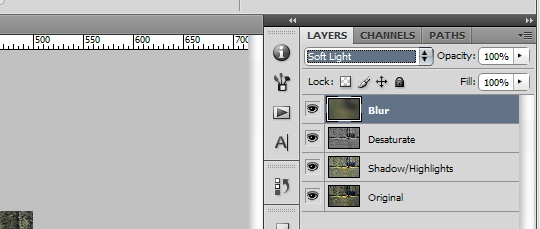
Step 4:
Let’s add some extra color to the picture. Duplicate the original picture (we will call it Blur), and put it on top of the other layers.
Next go to Filter>Blur>Gaussian Blur, set the Radius around 40 pixels.
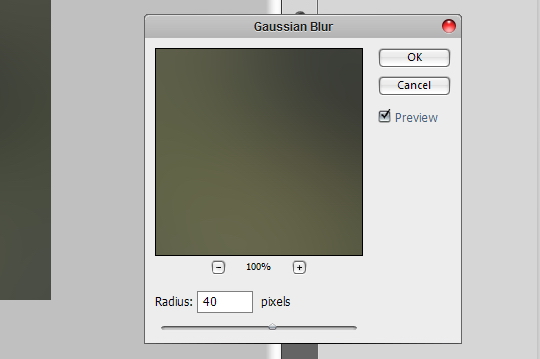
Change the layer blending to “Soft Light“.
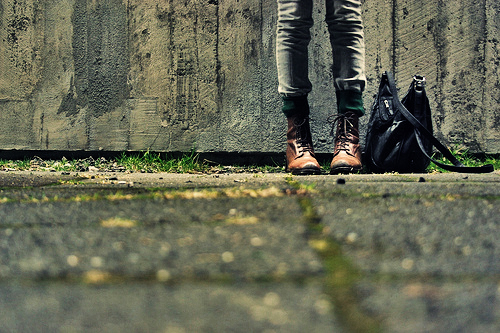
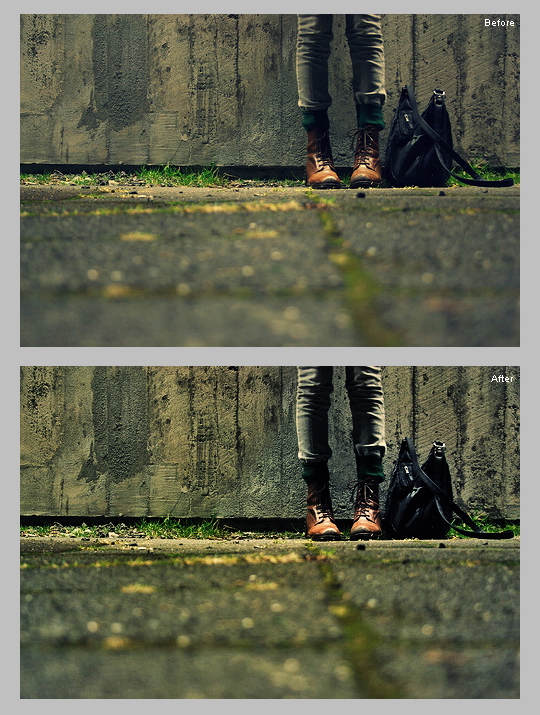
Final Result:
Pamoka ne mano, bet man pravertė.